
Warhammer 40k Order of Play

Command Phase
Both players gain a Command Point, which is a resource used to aid them in strategic benefits that they can use, such as stratagems and re-rolls.
During this phase you’ll want to be aware of any Army Rules that you have that take place in the Command Phase.
You will also take any Battle Shock tests that need to be addressed. This is for any unit that took up to half their unit strength in casualties. They will need to roll 2D6 and roll equal to or higher than their Leadership score.
You will also decide what objectives are controlled by your units.

Movement Phase
This is where you move your models across the table up to the units movement speed. You will want to make sure you set your models up so that they can perform future actions, or even hide!
Units that are not within 1inch of an enemy model can make a Normal move. Units can also opt to make an Advance move, which allows them to move an additional D6 inches forward, however, this makes it so that unit can’t shoot or charge that turn.
Units that are within Engagement Range of an enemy, within 1inch can make a Fall Back move, which retreats them from combat. Units that do so may not shoot or charge.
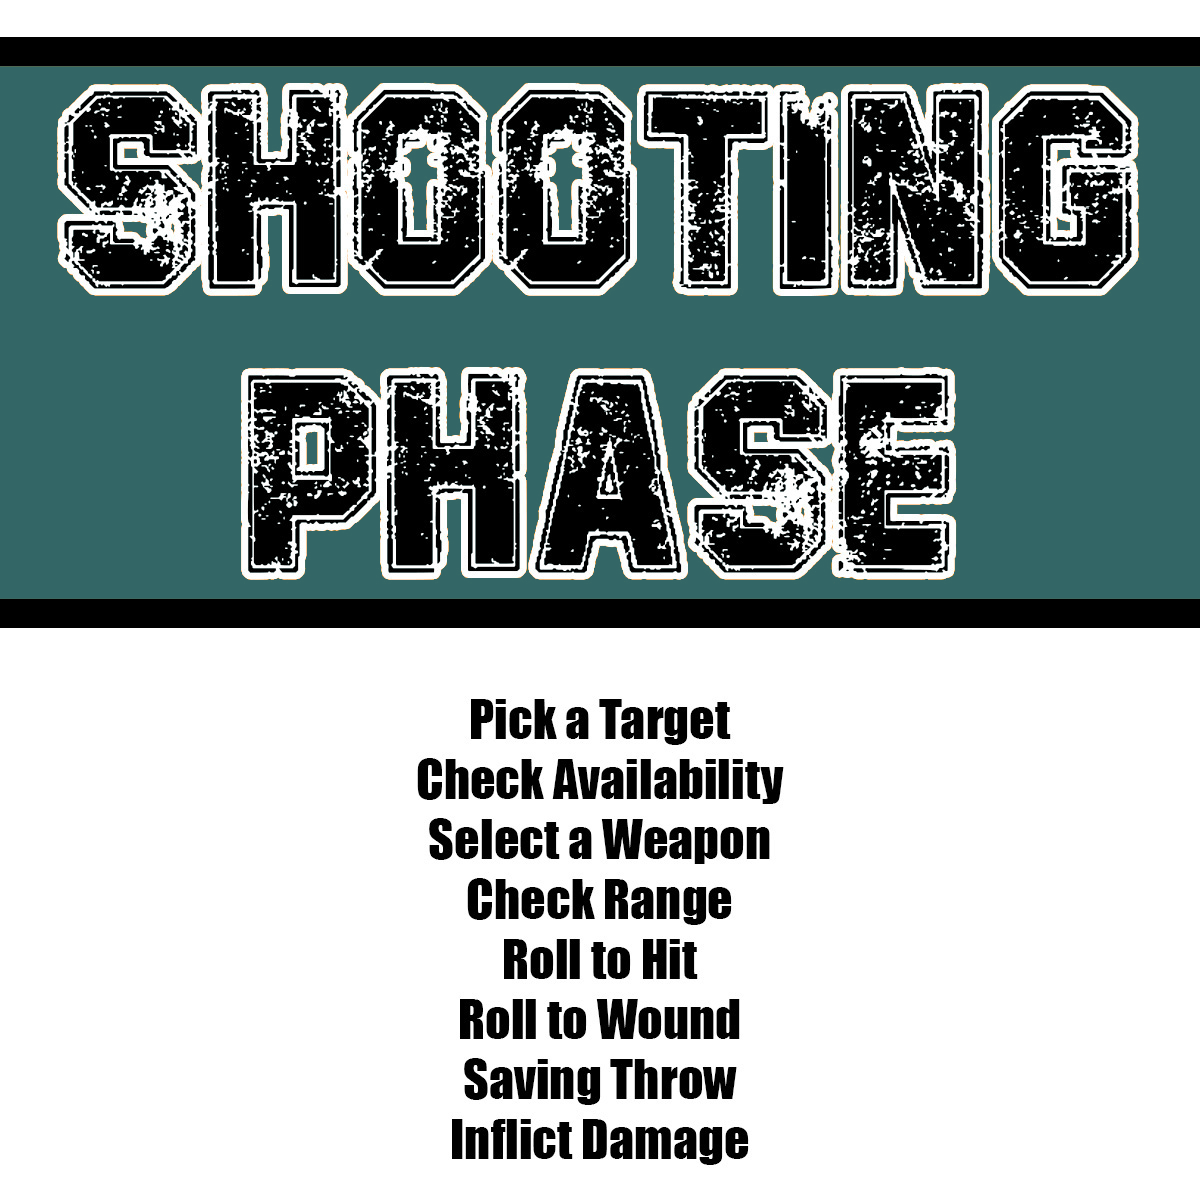
Shooting Phase
The shooting phase allows units to fire their ranged weapons. A player will nominate what targets a unit is firing at before they roll. Units and Vehicles may split fire between targets as long as targets are within range of the targets.
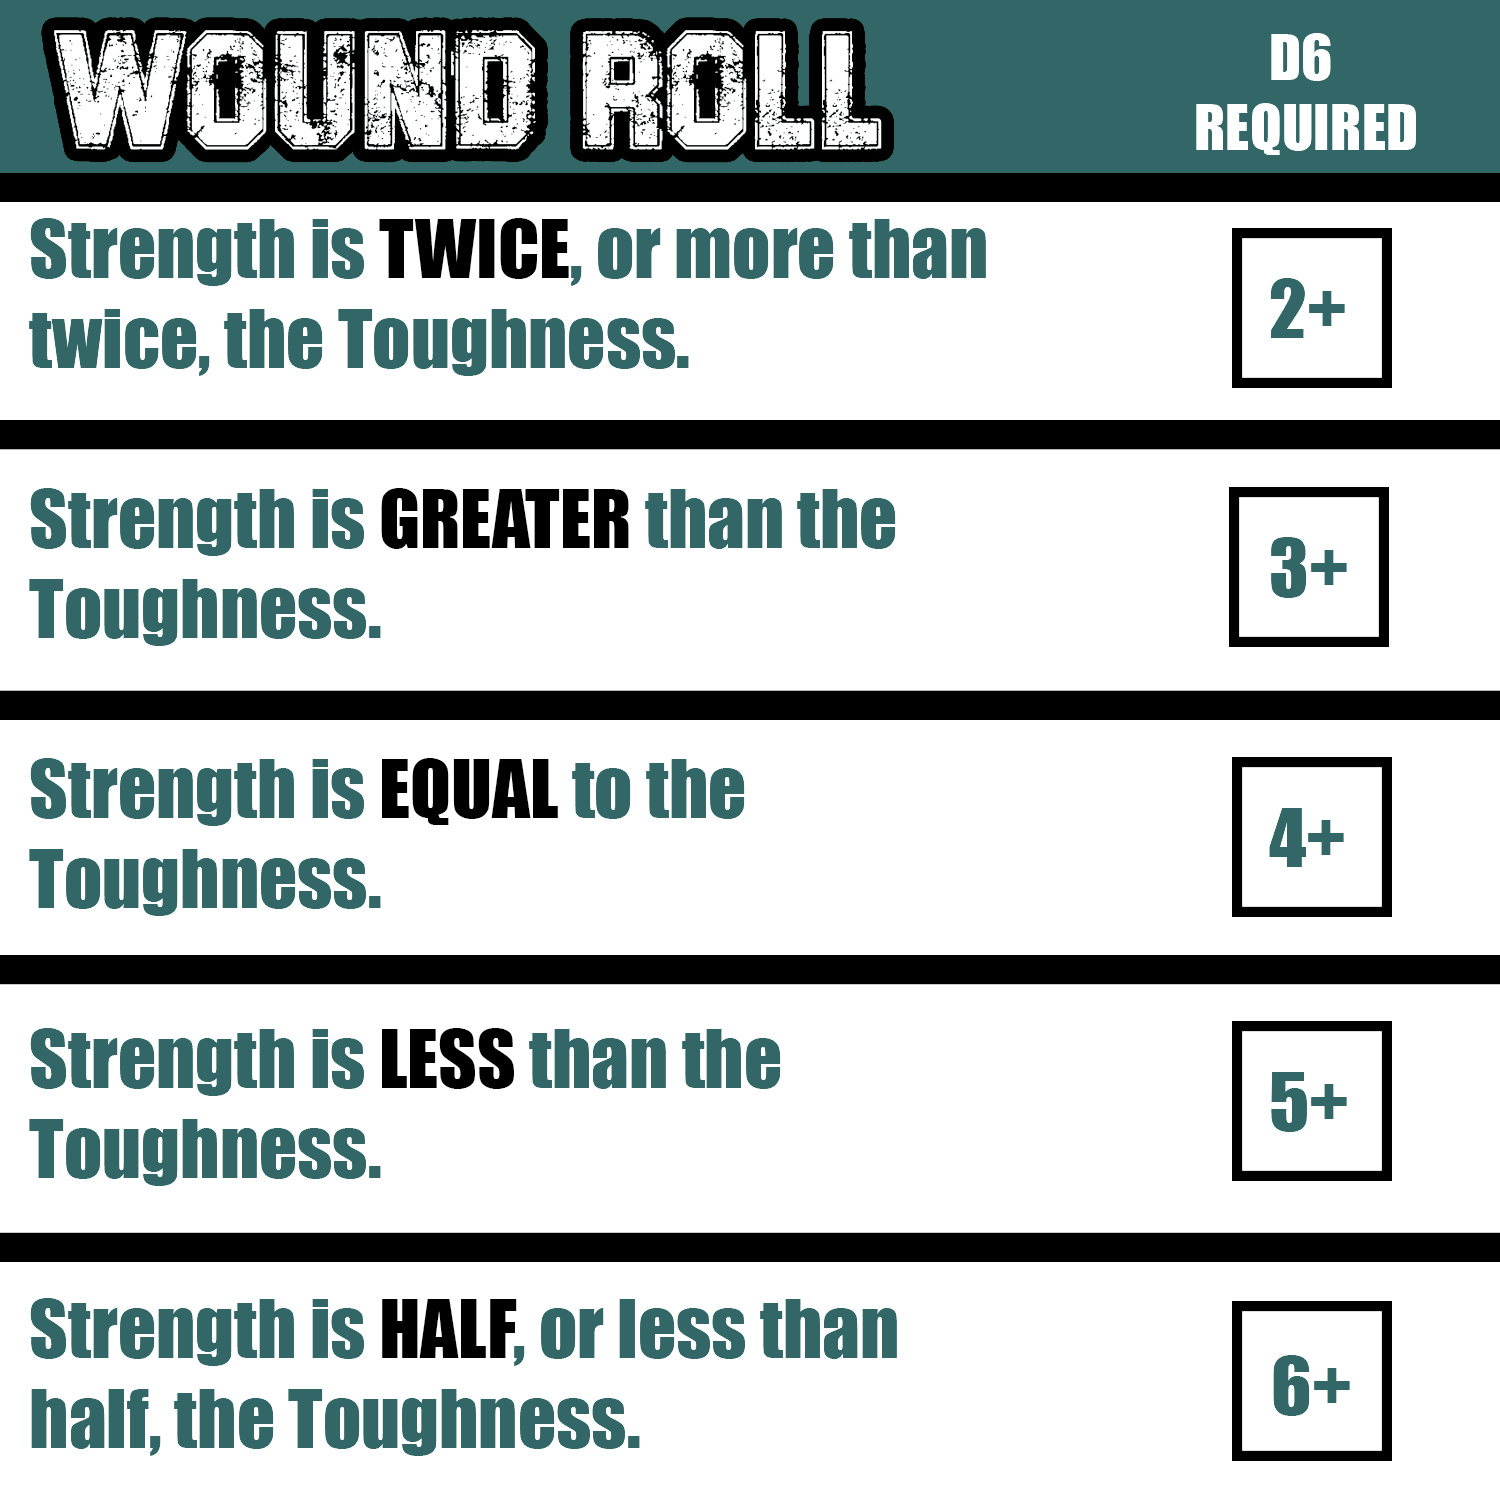
You roll a D6 for each attack that weapon has. You will need to roll to match or exceed the Ballistic Skill (BS) of that weapon profile to have a successful hit. You then roll, for each successful hit, the strength of that weapon against the toughness of the target. If the Strength and Toughness are the same, then the roll of a 4 is needed. If the Toughness is higher than the Strength but under double the strength, the roll of a 5 is needed. If the Toughness of the target is double or higher than the Strength, then the roll of a 6 is needed. If the Strength is higher but less than double the Toughness score, then a 3 is needed on the D6 roll. If the Strength is double or higher than the Toughness, then the attacked wounds on a 2 or higher.
There will be modifiers that affect these rolls depending on special rules of weapons or army rules.
Those that are wounded will roll saves against the attacks using their Save (SV) stat as a baseline. This can be altered by Armor Piercing (AP) of the weapon negatively, or by cover in a positive way.
There are many special rules for different weapons, it is important to read those carefully.

Charging Phase
This is where units have the opportunity to close in and attack their opponents in melee.
Units will declare a charge against another unit and then roll 2D6 to see if they meet the distance between the two units. A successful charge gets the unit into Engagement Range of the opponent, within 1inch.


Fight Phase
Units that are in Engagement Range will take turns pilling into their opponents. This allows the model to make a 3inch movement to arrange themselves around their enemy for combat.
You roll a D6 for each attack that weapon has. You will need to roll to match or exceed the Weapon Skill (WS) of that weapon profile to have a successful hit. You then roll, for each successful hit, the strength of that weapon against the toughness of the target. If the Strength and Toughness are the same, then the roll of a 4 is needed. If the Toughness is higher than the Strength but under double the strength, the roll of a 5 is needed. If the Toughness of the target is double or higher than the Strength, then the roll of a 6 is needed. If the Strength is higher but less than double the Toughness score, then a 3 is needed on the D6 roll. If the Strength is double or higher than the Toughness, then the attacked wounds on a 2 or higher.
There will be modifiers that affect these rolls depending on special rules of weapons or army rules.
Those that are wounded will roll saves against the attacks using their Save (SV) stat as a baseline.